Adding equipment operators is a very important task as it forms part of the site’s security that ensures correct operation of the system. Note that this process is part of the maintenance that the site support person will need to ensure they update as required. SmarTrack® makes this task easy as it can import CSV files pre-filled with operator details—use the CSV template described below to prepare a list of the end-user operators and if possible, their license details and access codes. Alternatively, you can add or remove operators individually.
Card Assistant
Card Assistant is used to add non-SmarTrack branded cards to the SmarTrack website as an operator.
On the machine
Gather all cards, turn machine on and wait for the Identify Operator screen.
Swipe all cards one by one, waiting approximately five seconds between each card. The display should show Operator Unknown after each swipe.
The order of which cards were swiped first needs to be noted, preferably with the time each was swiped.
On the SmarTrack Website
Using Card Assistant
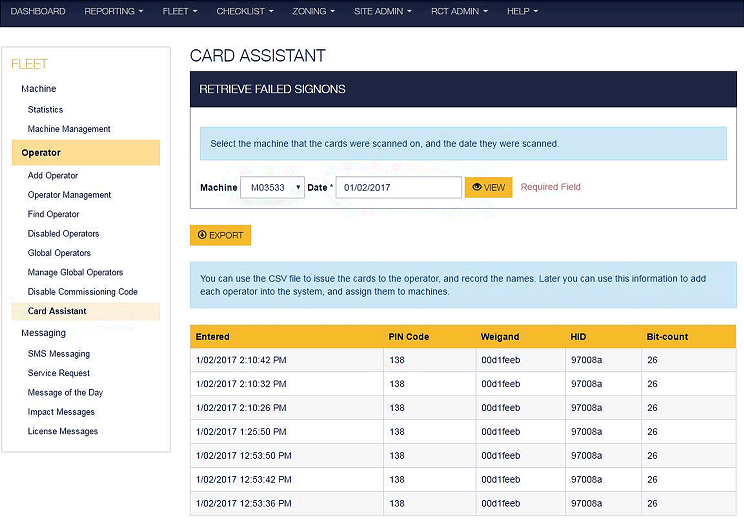
- From the menu on the ribbon bar, click FLEET and then Card Assistant.
- Select the Machine that the cards were swiped on (in this case M03533).
- Select the date when the card was swiped, then click
 .
. - Now you can check the times and the order that the cards were swiped.
- The pin code is the number to note down. In the example below, the pin code is 138.
- When adding an operator, the code must be six digits in length. E.g. in the example below, this code would be 000138.
Download a CSV Template
- From the menu on the ribbon bar, click FLEET and then Operator Import.
- Click
 .
. - A file named 'OperatorTemplate_en.csv' will be downloaded on your download folder.
Editing the CSV File
Use a spreadsheet application or a text editor to edit the CSV file. Ensure any data you enter follows the following format; otherwise, the import will fail.
| Operator Name | Access Code | Access Type | Role | Language | License Expiry |
| Name (Required field. Maximum 50 alphabetical characters) |
PIN Number (Up to six digit code number) |
All, Keypad or Card (If blank or incorrect will default to All) | Operator or Supervisor (If blank or incorrect will default to operator) |
Language (only languages available on the site will be accepted. If blank or incorrect will default to English) |
dd/mm/yyyy (No other format will be accepted. Date must be future) |
| Operator 1 | 652 | All | Operator | Chinese | 25/05/2021 |
| Operator 2 | 100025 | Keypad | Supervisor | English | |
| Operator 3 | 136542 | Card |
| License Notes | License Number | Permit Expiry | Category | Department(s) |
| Free text field (Max 255 alphanumeric characters) |
License Number (Maximum 20 alphanumeric characters) |
dd/mm/yyyy (No other format will be accepted. Date must be future) |
Category names (Separated by semi colons) | Department names (Separated by semi colons) |
| Free Text | Free Text | 26/05/2021 | Category1;Category2 | Department1;Department2 |
| Category3 | Department3 | |||
| Category2 | Department3 |
Export Operator listing to CSV File
- From the menu on the ribbon bar, click FLEET and then Operator Management.
- Click
 .
. - A file named 'Operator listing.csv' will be downloaded into your Download Folder.
- This file can be updated and upload later on.
Upload CSV File
- From the menu on the ribbon bar, click FLEET and then Operator Import.
- Click
 .
. - Select your CSV file.
- Click
 .
.
Add an Operator
- From the menu on the ribbon bar, click FLEET and then Add Operator.
- Add required information into the fields.
- Click
 .
.
Assign Operator to Machine/s
Tick the machine/s you need the operator to have access to.
Example:
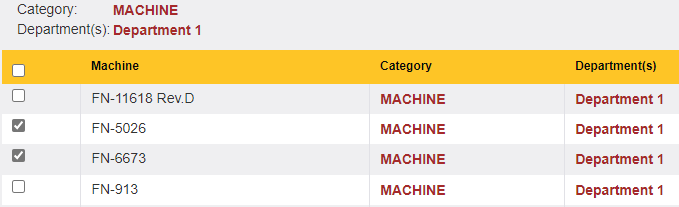
Assigning an operator to a machine can be completed in various ways.
 This button assigns the operator to the selected machines.
 This button assign operator access to ALL machines on site. Will automatically tick all the machines.
 This button assign access to ALL machines in Categories operator assigned to.
 This button assign access to ALL machines in departments operator assigned to.
 This button skip this step and go to listing page. This button will keep settings unchanged if there's previous assignment.
Assign Operators and Machines via Departments
- From the menu on the ribbon bar, click ADMINISTRATION and then Department Management.
- Click for the department you wish to view.
- Locate the operator or machine to edit and click
 .
. - Edit details as required.
- Click .
Assign Operators and Machines via Categories
- From the menu on the ribbon bar, click ADMINISTRATION and then Category Management.
- Click for the category you wish to view.
- Locate the operator or machine to edit and click .
- Edit details as required.
- Click .
Assign All Operators to All Machines Onsite
- From the menu on the ribbon bar, click FLEET and then Machine Management.
- Click
 to complete this operation.
 - Click OK.
Deactivate an Operator
- From the menu on the ribbon bar, click FLEET and then Operator Management.
- Locate the operator to deactivate, and put a tick next to it
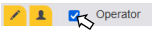 .
. - Or for bulk deactivation put a tick on the header to select all
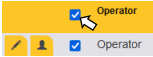 .
. - Confirm operation by clicking
 .
.
NOTE: Deactivated operators will still show in report data.
Activate a deactivated operator
- From the menu on the ribbon bar, click FLEET and then Deactivated Operators.
- Locate the operator to activate, and click . Update the details and click
Delete an Operator
- First deactivate the operator you wish to delete.
- From the menu on the ribbon bar, click FLEET and then Deactivated Operators.
- Locate the operator to delete and put a tick next to it
 .
. - Or for bulk deletion tick the header to select all
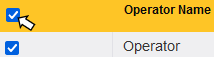 .
. - Confirm operation by clicking
 .
.